|
RAID 0 what is Raid 0?
First, create a hard disk drives. 1. Click your OS Client (Windows Server 2008) and click the "settings".  2. Click the "Create" button to create a storage.   3. Change the file name.  4. Create a total of seven HDD's:
 5. Select each file created, then click "choose" to add the files.  6.Start the server. To set up a striped volume in Windows Server: 1. Open Computer Management. 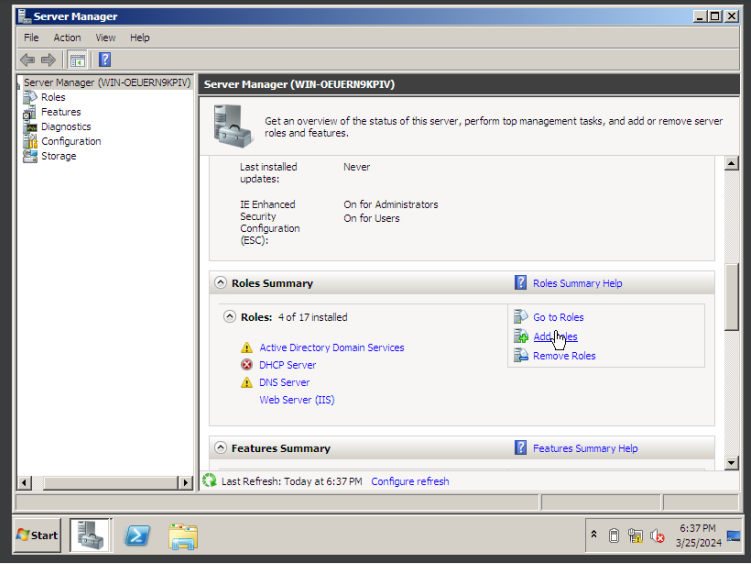 2. Navigate to Storage > Disk Management.  3. Right-click on Disk 1 and choose "New Striped Volume."   4. Select the disks you want to include by clicking "Add" and then click "Next."  5. Proceed by clicking "Next" through the following prompts.    6. When prompted about converting the disk, simply click "Yes" to confirm.  7. Choose the desired disk for mirroring with the selected volume.    RAID 1 what is Raid 1?
1. Navigate to the "Server Manager" application and access the "Storage" section followed by "Disk Management."    2. Identify and click on the "System Reserved" volume within the Disk Management interface. 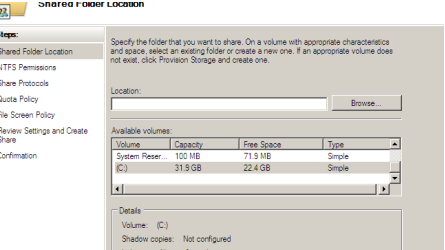 3. Right-click on the "System Reserved" volume and opt for the "Add Mirror..." option from the context menu.  4. Confirm the action by selecting "Yes" to initiate the disk conversion and mirroring process. 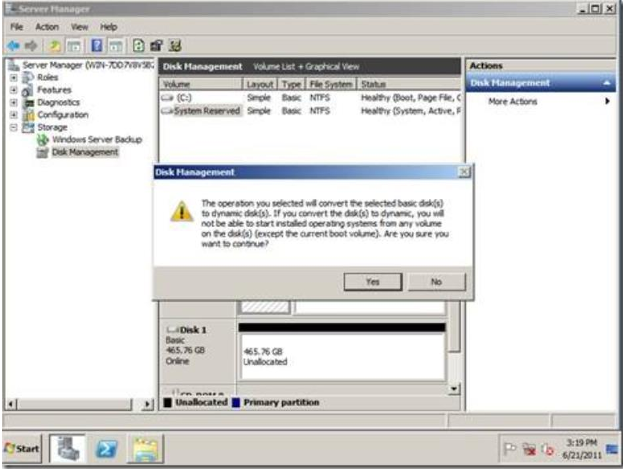 5. Upon completion of mirroring for the "System Reserved" volume, the Disk Management interface will reflect the changes accordingly.  6. Proceed by selecting the "Volume C:" and initiate the "Add Mirror..." process.  7. Choose the desired disk for mirroring with the selected volume. 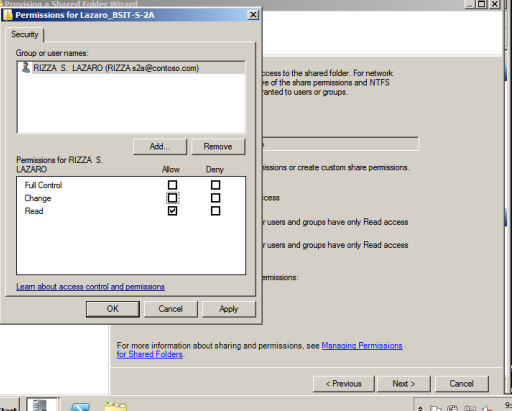 8. Allow sufficient time for the mirroring process to complete. During this period, monitor the progress through the Disk Management interface. Note that alerts may appear, indicating ongoing mirroring operations. 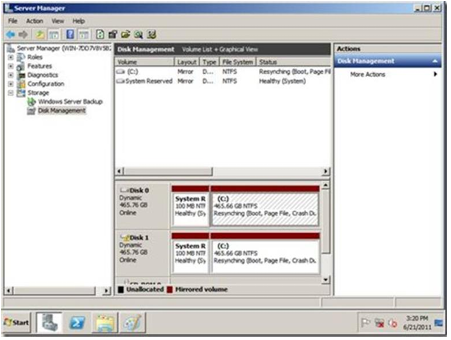 9. Once mirroring is finalized, verify the changes within the Disk Management interface to ensure successful completion. 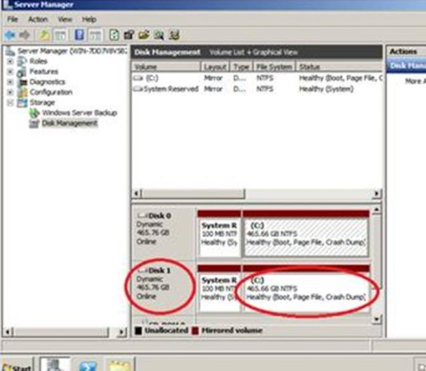 In the event of Disk 0 failure, follow these steps to boot into Windows: 1. Access the boot menu and select "Windows Server 2008 R2 – secondary plex." Note: It is important to acknowledge that this setup involves a software RAID configuration. Therefore, it is advised not to implement this setup for critical systems, as it carries inherent risks. Use this configuration at your own discretion. 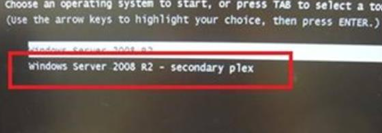 RAID 3 what is Raid 3?
1. Begin by accessing your RAID management interface or software. Look for an option to create a new RAID volume or array. Choose the wizard or guided setup option to assist you through the process. 2; In the wizard, you'll be prompted to select the disks you want to include in the RAID setup. Typically, you'll select the disk you want to copy and another disk to serve as its mirror. This will create a RAID 1 setup, also known as mirroring. 3. During the setup process, you'll encounter options for configuring the volume type. Ensure that you select "Mirror" or "RAID 1" as the volume type. This instructs the system to create a mirrored setup where data is duplicated across the selected disks. 4. After confirming your selections, proceed with creating the RAID 1 volume. The system will then initialize and configure the disks to operate in a mirrored fashion, providing redundancy and data protection. 5. If you intend to transition from RAID 1 to RAID 3, you'll need to install a third-party RAID card controller that supports RAID 3 functionality. This process involves physically installing the controller into your system and configuring it to manage the RAID setup. 6. Once the third-party RAID card controller is installed, access its configuration interface or software. Follow the provided instructions to configure the RAID 3 setup. This typically involves selecting the RAID level, specifying the disks to be included, and configuring any additional settings such as stripe size and parity. 7. After configuring the RAID 3 setup, review the settings to ensure everything is correct. Once verified, finalize the configuration, and the system will initialize the RAID 3 volume. RAID 5 what is Raid 5?
1. Log in using the Windows Administrator Account. 2. Navigate to the Computer Management tool by going to Start, then Administrative Tools, and selecting Computer Management. Alternatively, you can run "compmgmt.csc" from the command prompt or Run dialog. 3. In Computer Management, locate and click on "Disk Management," or you can run "diskmgmt.msc" from the command prompt or Run dialog. 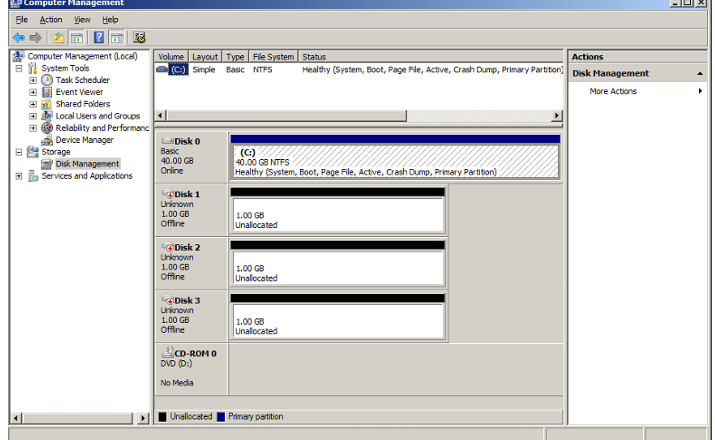 4. Within Disk Management, right-click on each new disk and choose "Online." Then, select "Initialize Disk." 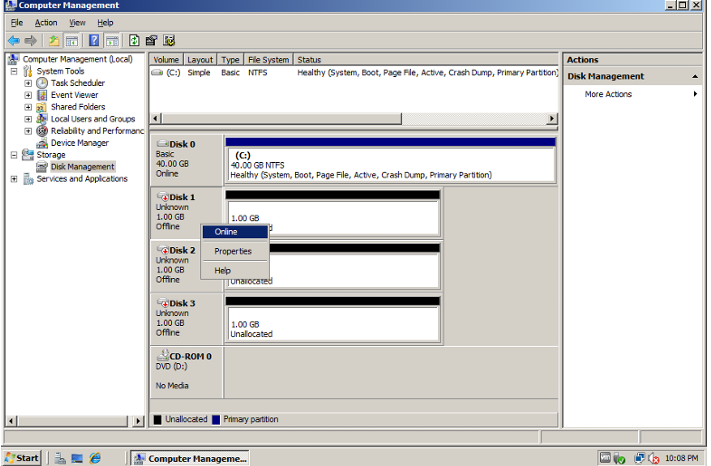 5. All disks should be selected by default. Click "OK" to proceed. 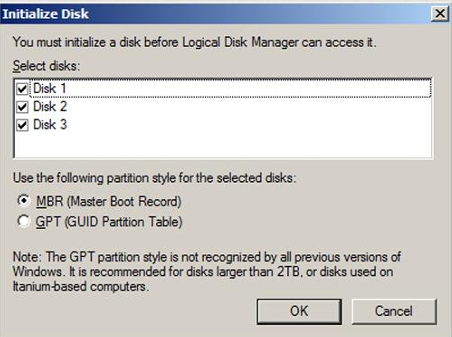 6. Right-click on one of the drives and select "New RAID-5 Volume..." 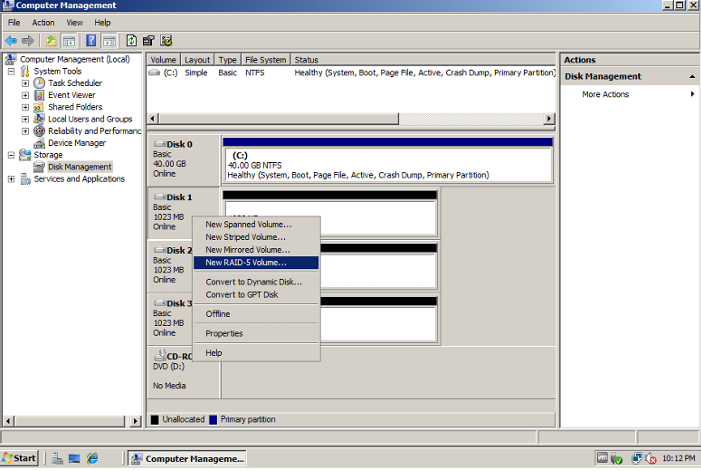 7. Follow the wizard prompts, clicking "Next" to proceed to the Disk Selection page. 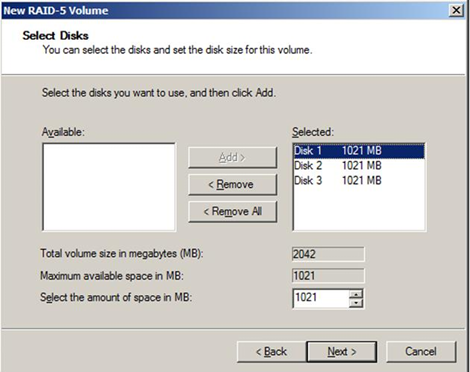 8. On the "Select Disks" screen, click "Add" for the disks you want to include in the 'Selected' list. Then, click "Next" to continue. MERGING AND DESTROYING 1. Open the `File Explorer` and select each RAID Drive. and right-click and navigate on New > Text Document. Do this to each RAID Drive to insert text file.  2. Double-click the created text file and add some content to it. After inserting text file on each RAID Drive, shut down your server.  3. Click your Win Server then go to its `Settings`. Navigate on `Storage`, from the storage tree, remove one of the disk for each RAID by selecting `Remove attachment`. Finally, start your server.  4. Click the Start Menu then navigate on Storage > Disk Management. There should be errors stating the failure of each RAID's.   5. Open your `File Explorer` and check the text files to each RAID Drive. As you noticed, RAID 0 drive is deleted.  6. Text files from RAID 1 and 5 are still functioning, Shut down your server.
0 Comments
Leave a Reply. |
View the PDF file.You can download the PDF file here.
|
||
